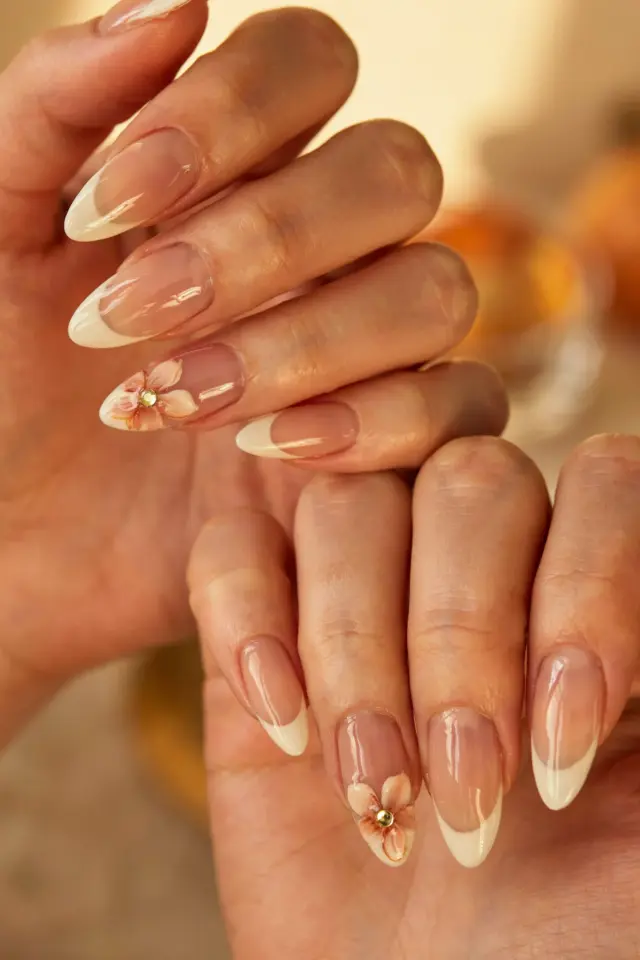
Why 2025 Is the Year of Coffin Ombre Nails (Without Breaking the Bank)
Let me be honest: when I first started looking into acrylic nail trends 2025, I assumed everything would cost a small fortune. But after talking to salons and scrolling through thousands of pins, I found that coffin shapes and soft ombre designs are actually some of the most affordable ways to get that high-end salon look. A good coffin nail shape gives your fingers a sleek, elongated line, and ombre gradients hide growing-out roots beautifully. Best of all, you can achieve both trends without needing a separate appointment for complicated nail art. I have tested several budget-friendly approaches, and they work perfectly for everyday wear.
Why Coffin Nails Are Still the Go-To Shape for 2025
Coffin nails, also called ballerina nails, have been around for a while, but they keep evolving. In 2025, the trend leans toward a slightly shorter coffin shape that feels more practical for typing, cooking, and general life. The squared-off tip tapers just enough to look chic without catching on everything.
What I love about coffin nails is that they make your fingers look longer and slimmer, and they work with any nail length from short-medium to extra long. For budget-conscious readers, ask your nail tech for a medium-length coffin. You will need less acrylic product, which often saves ten to twenty dollars per fill. Plus, shorter coffins chip less frequently, so your manicure lasts closer to three weeks instead of two.
Soft Ombre Acrylic Nails: A Low-Maintenance Gradient
Ombre designs get a bad reputation for being expensive, but simple two-tone gradients are actually one of the most cost-effective nail art options. A classic white-to-nude or pink-to-clear ombre uses only two colors and a sponge, which means your nail tech can finish it in under fifteen minutes. That keeps the service price lower than geometric patterns or hand-painted flowers.
I recommend asking for a “baby ombre” where the transition is very gradual. This style grows out seamlessly because the fade starts near the cuticle and blends into a lighter tip. Even after a week or two, regrowth is much less obvious than with a solid dark color. You save money on fill frequency, and you still get that polished, trendy look.
Budget-Friendly Color Combinations for Everyday Glam
You do not need expensive pigments to make an ombre pop. Here are three affordable color combos that I have tested and that always get compliments:
- Milky white to sheer pink – Looks clean and professional, works with any outfit, and costs almost nothing because salons always have these two colors in stock.
- Nude to soft lavender – A subtle twist on the classic French ombre. The lavender adds a touch of 2025 color without being loud.
- Clear to champagne shimmer – Use a fine glitter top coat instead of a full glitter acrylic. That way you can change the glitter for each fill without paying for a full removal and redo.
Each of these combos uses products your salon already has, so you avoid the upcharge for specialty polishes. Save your money for good cuticle oil instead.
How to Keep Your Acrylic Nails Looking Fresh on a Tight Budget
One thing I learned the hard way: expensive nails look cheap if you neglect the upkeep. But you do not need salon visits every week. Here is my practical routine that keeps coffin ombre acrylics looking fresh for three to four weeks:
- Cuticle oil daily – A cheap jojoba oil mix works better than most store-brand products. Apply morning and night to prevent lifting.
- Wear gloves for dishes – Water weakens the acrylic bond. A pack of cheap rubber gloves costs less than one emergency repair.
- File the free edge – Keep a fine-grit buffer in your purse. A quick swipe every few days prevents snags and keeps the coffin shape even.
- Skip the soaking removal – When you are ready for new nails, go back to the salon for a safe removal. Trying to chip them off yourself can damage your natural nails and lead to costly repairs.
These small habits save you from needing a full new set every month. Your wallet and your nail beds will thank you.
Nail Art Inspo for the Minimalist Ombre Lover
If you want a little extra flair without paying extra, ask for a single accent nail. For example, keep four nails as a soft pink-to-white ombre and paint the ring finger with a sheer nude and a thin silver line near the cuticle. That simple change costs nothing extra (the silver line is just a quick brush stroke) but makes your manicure feel custom.
Another trick I use: choose a shimmer top coat that has a subtle holographic effect. It catches light in different ways depending on the angle, so your nails look like they have multiple ombre layers even though the base is simple. Many drugstore top coats provide this effect for under ten dollars.
Realistic Expectations for Coffin Acrylics at Home vs. Salon
I have tried DIY acrylic kits, and I will be direct: unless you have practiced for months, home acrylic nails can turn lumpy or lift within days. The coffin shape is especially tricky to file correctly without a professional e-file. For a budget option, I recommend going to a salon for the initial application and then learning to maintain the shape yourself between fills. Many salons charge a lower price for a “fill-only” appointment if you already have good acrylic coverage. Just bring a photo of the ombre you want, and they will match it quickly.
If you absolutely want to learn at home, start with press-on nails that mimic the coffin ombre look. High-quality press-ons from Etsy or local
#acrylicnailtrends #coffinnails #ombrenaildesigns #nailartinspo #acrylicnails
Leave a Comment