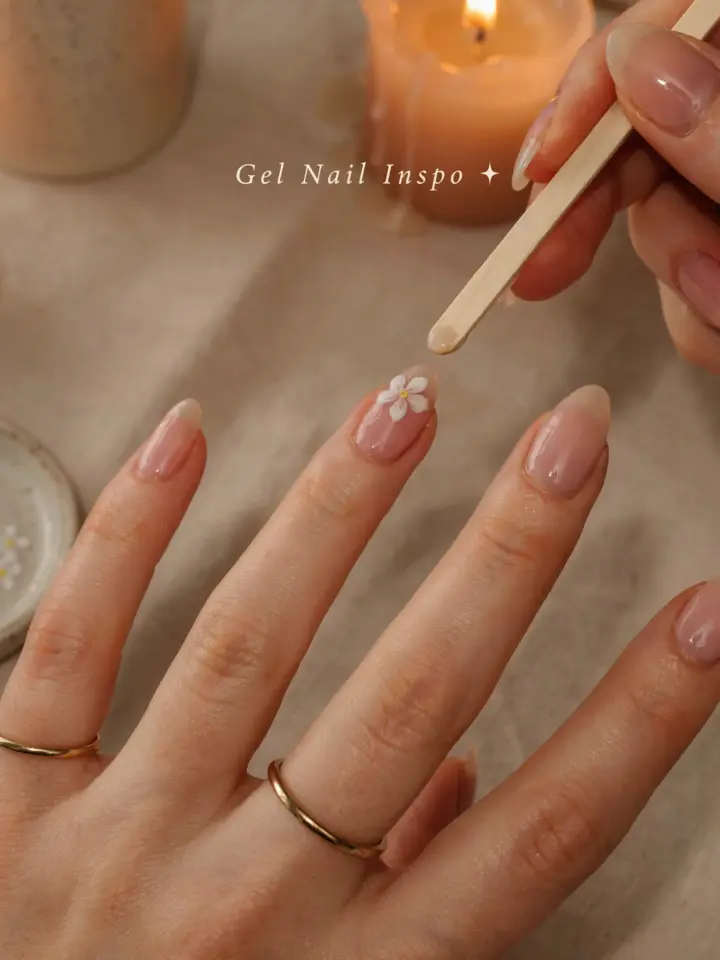
Spring is finally here, and with it comes the urge to refresh everything from my wardrobe to my nail color. This year, I have been completely smitten with SpringFrenchFloralNails. There is something about a classic French tip paired with delicate little flowers that feels both polished and playful. The best part? You do not need a single nail art brush to pull it off. Just a simple toothpick and a steady hand. I have been testing this method on myself for the past few weeks, and I am surprised by how clean and professional the results look. Let me walk you through the whole process so you can try it at your next manicure evening.
Why the Toothpick Method Works for Floral Nail Art
When I first heard about using a toothpick for nail art, I was skeptical. Brushes felt like the only proper tool. But after watching a few videos and giving it a try, I changed my mind. Toothpicks are incredibly precise for tiny details. The pointed tip lets you place dots and petals exactly where you want them, without the risk of a brush dragging or bleeding.
Another reason I love this approach: it is budget friendly. You probably already have toothpicks in your kitchen drawer. There is no need to buy expensive dotting tools or fine liners. For anyone who is new to DIY nail art, this method is forgiving. If you make a mistake, you can wipe it off with acetone and start over without ruining your base coat. The toothpick method is truly a ToothpickNailDesign that anyone can master.
What You’ll Need for This Spring French Floral Manicure
Gathering your supplies before you start makes the whole process smoother. Here is my personal list of essentials for this GelNailInspo look. I use gel polish because it lasts longer, but regular polish works too if you prefer.
- A base coat (gel or regular) to protect your nails.
- Two colors for the French tip: a sheer nude or pink for the base, and a crisp white (or pastel) for the tip.
- A small brush or a nail art tape to create the French tip line. I sometimes use the edge of a clean tape strip.
- Gel polish in a soft pastel shade for the flowers. I like a light lavender or baby pink.
- Yellow or white polish for the flower centers.
- A top coat (gel or regular) to seal everything.
- Wooden toothpicks (flat or round, either works).
- Acetone and a small brush for cleaning up edges.
- A UV/LED lamp if you are using gel polish.
Take a moment to set up your workspace near a good light source. Natural daylight is best, but a desk lamp with a bright bulb works too. I also like to have a paper towel nearby to wipe the toothpick between colors.
Step-by-Step: How to Create a French Tip Base at Home
Before you add any flowers, you need a clean French tip foundation. This is the base for your EasyNailTutorial. Start by applying your base coat and curing it under the lamp (or letting it dry if using regular polish). Then paint two thin coats of your sheer nude or pink shade. Cure or dry thoroughly between coats.
Now for the tip. I prefer a soft, rounded smile line. You can use a strip of nail art tape to guide your brush. Place the tape slightly below where you want the white curve, then paint the white polish along the free edge. Peel off the tape immediately while the polish is still wet. If you do not have tape, you can freehand the curve by dragging a small brush from one side to the middle, then from the other side to the middle. Keep your strokes light. Cure the white tip, then apply a thin layer of top coat and cure again. This top layer helps the floral details stick better.
Painting Floral Accents with a Toothpick (No Brushes Needed)
Here is where the magic happens. Dip the tip of a clean toothpick into your chosen floral polish. You only want a tiny bead of color on the tip. Gently press it onto your nail to create five small dots arranged in a circle. That is your flower. Start with one dot in the center, then add four dots around it, slightly overlapping. Do not worry if they are not perfect. Imperfect petals look more natural.
For a different flower shape, press the toothpick down and drag it outward slightly to create a teardrop petal. Repeat four or five times around a central dot. I find that two or three small floral clusters per nail look balanced. You can place them near the cuticle, along the smile line, or scattered across the nail. Here are a few placement ideas:
- One flower near the cuticle, one in the center of the nail.
- A small cluster of flowers only on the accent
#SpringFrenchFloralNails #DIYnailart #ToothpickNailDesign #GelNailInspo #EasyNailTutorial
Leave a Comment