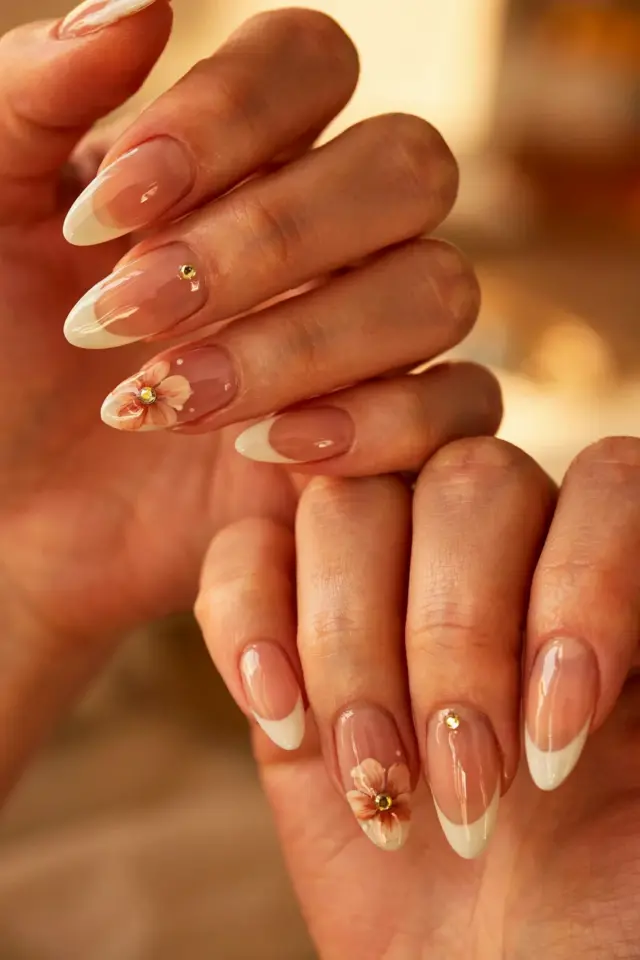
Fall acrylic nail trends are hitting different this year, and honestly, I’m here for it. Warm browns, glossy nudes, and almond shapes are everywhere I scroll through, which is perfect because those three things just work like a dream together. I’ve been collecting my favorite fall nail art looks for weeks now, and this particular list keeps floating back to the top of my saved folder. Save it for your next salon visit, or try a few of these at home if you’re feeling brave like I sometimes am.
Why Almond Is the Ultimate Thanksgiving Nail Shape
Almond nails are the unsung hero of the holiday season. They taper gently at the tip but stay wide enough at the base to give your fingers a longer, more elegant line, no matter your hand shape. Unlike stiletto, which can look a little aggressive for a family dinner, almond feels polished without trying too hard. That’s the exact energy I want when my aunt is passing the mashed potatoes.
And here’s the practical bit: almond acrylics give you a decent size canvas for nail art without getting in the way of, like, buttoning your jeans or reaching into a purse. For Thanksgiving, that matters more than you’d think. You can go short or long with this shape, too. If you’re busy cooking all day, keep them on the shorter side. If you’re just showing up to eat, go ahead and get dramatic with it.
How to Prep Your Acrylics for Fall Nail Art
Ok so before you even think about designs, you need a clean base. I learned this the hard way after a lumpy cinnamon swirl attempt that looked more like a cheese puff. Prepping your acrylics properly takes maybe five minutes, and it saves you from touching up every single nail later.
- Buff the surface lightly with a soft file to remove shine. This helps polish stick better.
- Wipe each nail down with rubbing alcohol or a nail cleansing wipe.
- Apply a good quality base coat, ideally one that’s ridge-filling so the surface is perfectly smooth.
- Let that base coat dry completely. Not half dry. Completely dry, I promise it’s worth waiting.
- Gather your fall polish shades ahead of time so you’re not rummaging mid-design.
Doing this little routine means your color will last through turkey dinner, a slice of pie, and probably another slice of pie. Speaking of which, bring a top coat to your salon appointment if you’re particular. Some salons use a fast-dry top coat that feels sticky for hours, and I’m not a fan. Just my small preference.
Cinnamon Swirl Nail Art Step by Step
Cinnamon swirls might be the coziest design on this entire planet, and they’re much easier to pull off than they look. You’ll need a warm brown polish, a cream or nude base, and one of those thin nail art brushes. Or honestly, a toothpick works in a pinch, I’ve done it before.
Start with two thin coats of your nude base and let them dry until they’re matte to the touch. Then dip your thin brush or toothpick into the brown polish and draw a loose spiral, starting at the center of the nail and curling outward. Don’t overthink it. Real cinnamon rolls don’t have perfect swirls either, so yours shouldn’t be perfect either. That’s exactly what makes this design look intentional and adorable.
For a two-nail twist, try making the swirl on your ring finger and thumb only. The rest get a simple glossy brown or just a clean nude. This is the classic “accent nail” move, and it keeps the design from feeling too busy for a Thanksgiving table.
Gold Foil Accent Nails: Simpler Than You Think
Gold foil is my go-to when I want a design that looks expensive without any actual effort. You can buy little sheets of gold foil at any craft store or online, and one pack lasts forever. I think I’ve had the same pack for two years and it’s still half full.
Here’s the process. Paint your nail a solid warm brown or a milky nude, then wait until it’s almost dry but still slightly tacky. Press a small piece of foil onto the center of the nail and peel it away slowly. Some foil will stick, some won’t, and that’s exactly what you want. The randomness gives it a crackled, organic look that fits right into fall.
For Thanksgiving specifically, I’d do this on the middle finger of each hand and leave the rest in a matte brown. That way you get a little sparkle without looking like a glitter bomb went off. Pair it with a cinnamon swirl on the ring finger and you’ve got a whole holiday story happening on your fingertips.
Matte Finish vs Glossy for Autumn
Let’s talk about the finish because it changes everything. I used to think matte was the only way to go for fall, but then I tried a glossy nude with one matte accent nail, and honestly, that combination is the winner. Matte gives you that cozy, suede-like vibe. Glossy gives you a clean, juicy look that catches the light when you’re holding a glass of cider.
Here’s my rule of thumb. If your design has lines or swirls or any kind of painted detail, go glossy. The top coat seals the detail and makes the colors pop. If your design is just a single solid color, like a warm caramel or a deep burgundy, matte makes it feel more muted and sophisticated. One of my favorite things to do is ask for a matte finish on all nails except the ring finger, where I go glossy. It’s a tiny detail that people always notice.
And yes, you can have both. Matte and glossy on the same hand is not a trend that’s going anywhere this season. It plays with texture in a way that plain color never could.
Short Almond Acrylics: Three Designs That Actually Work
Not everyone wants long nails for Thanksgiving, and that’s completely fine. Short almond acrylics are actually easier to maintain while you’re chopping vegetables or wrapping silverware in napkins. The trick is to choose designs that don’t rely on a lot of horizontal space. A tiny gold dot at the cuticle, for example, looks way better on a short nail than a big swirly pattern.
First design: do a glossy nude base and then add a thin vertical stripe of gold foil right down the center of each nail. That instantly makes short nails look elongated and sleek. Second design: go with a matte forest green or burnt orange and add a single tiny leaf shape on the thumb and ring finger. I know drawing a leaf sounds hard, but you can just use a dotting tool and drag it gently to form a leaf. It’s surprisingly forgiving.
Third design is the easiest one of all. Paint every nail in a warm espresso brown, then take a toothpick and add small dots of cream polish around the cuticle area. Like little scattered crumbs. It’s subtle, a little weird, and somehow very autumn. My sister asks for this one every single year.
Choosing Your Thanksgiving Nude Tone
Nudes aren’t all the same, and finding the right one for your skin tone will make your almond acrylics look about a million times more put together. If you have fair skin, look for a nude with a pink or peach undertone, something that feels like your natural nail but cleaner. For medium or olive skin, warmer beige and caramel nudes are your best friends. Those shades pick up the golden warmth in autumn light.
For deeper skin tones, go with the ones that have a bit of cocoa or mocha in them, not too light, not too dark. The goal is to find a shade that blends with your fingertips but still gives a slight contrast. Honestly, the easiest way to test is to hold the polish bottle next to your hand in the salon. If it disappears against your skin, that’s a good sign. If it washes you out, you’ll know right away.
And here’s a random tip that sounds weird but works. Look at the veins on your wrist. If they look green, you lean warm, so pick warm nudes. If they look blue, you lean cool, so pick pinky nudes. It’s not rocket science, but it gets me the right shade every time. My own veins are a confusing mix of both, which is why I own seven different nude polishes. My collection goes on forever.
So those are the designs I keep coming back to for Thanksgiving. Almond shapes, warm browns, gold foil, and a few matte finishes here and there, they all just feel like autumn in the best way. Pick one or mix a couple together, and I promise your nails will look intentional and cozy no matter what your plans are.
What’s the first design you’re saving to Pinterest? Tell me in a comment below, or just save this post and bring it straight to your nail tech. I’d love to hear which one ends up on your hands this Thanksgiving.
#acrylicnailtrends #fallnails #almondnails #nailartideas #thanksgivingnails
Leave a Comment