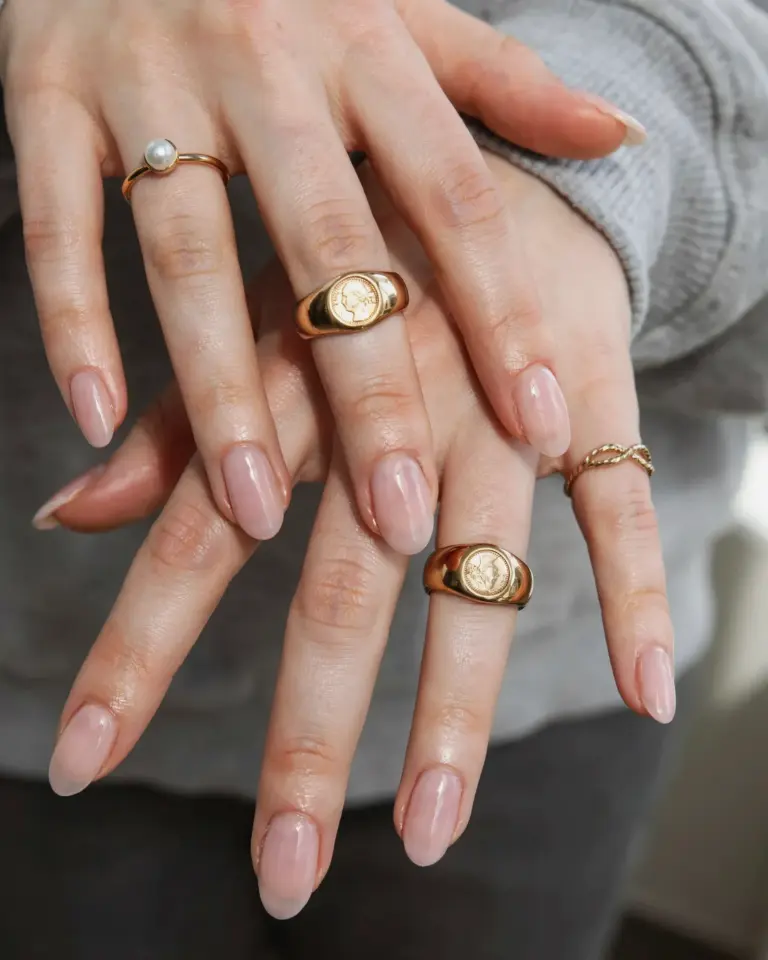
If you’re tired of plain nails but don’t want anything too flashy, this nude nail art with gold accents is the perfect middle ground. It’s that simple: paint a nude base, tape off a thin line, and add gold polish. Honestly, I used to think minimalist nails were boring until I tried this combo. Now it’s my go-to for when I want to look put together without screaming for attention. Save this for your next nail session, because you’ll want to come back to it again and again.
Simple Striped Gold Accent on a Nude Base
Let’s start with the classic that never fails. A thin gold stripe across the center of your nude nail creates instant elegance. You don’t need a steady hand either. Just grab some striping tape, paint your base color, let it dry, then tape off a straight line. Paint over it with a gold polish, peel the tape off while the gold is still tacky, and you’re done. I use a nude like OPI’s “Bare My Soul”, it’s warm without being too pink. And for the gold, Essie’s “Good as Gold” works beautifully, though any metallic gold with tiny shimmer particles does the trick. The line can be horizontal, vertical, or even diagonal for a bit of edge. But horizontal is my favorite; it lengthens the nail visually. One warning though: wait for that base coat to dry completely. Otherwise the tape pulls up the polish and you’ll have a mess. Trust me, I’ve learned the hard way.
Negative Space with Gold Foil: An Easy Twist
Ok so here’s the thing about negative space, it looks like you spent hours at a salon, but you really just did it in twenty minutes. Start with a nude base, but only apply it to half the nail. I like to leave the cuticle area bare for a crescent-shaped negative space. Then take a piece of gold transfer foil, cut it into tiny irregular shapes, and press it onto the still-wet nude polish. The foil sticks only where the polish is tacky, so you get these organic, glinty patches. It’s unpredictable, and that’s what I love about it. Not gonna lie, the first time I tried foil I accidentally pressed it onto my cuticle and had to scrub with acetone for five minutes. So use tweezers. And work one nail at a time. The result is a mix of bare nail, soft nude, and metallic gold flecks, like a little abstract painting. Perfect for when you want something that feels artistic but still minimal.
Gold Dot Accents for a Playful Look
Dots are underrated, honestly. They add a playful vibe without going overboard. For this theme, paint your nails a soft nude color, I’m partial to a shade called “Milk and Honey” from Zoya. Once it’s dry, use a dotting tool (or the back of a bobby pin, no judgment here) to place a few tiny gold dots near the base of each nail. You can do three dots in a triangle, a single dot centered, or a line of dots going up the middle. I prefer an asymmetrical pattern: two dots on one side, one dot on the other. It feels modern and a bit quirky. If you don’t have a dotting tool, a toothpick works but the dots come out smaller. Actually, that’s a plus if you want a super subtle accent. Here’s a weird little aside, I once did this design while watching a documentary about deep-sea creatures, and I kept thinking the dots looked like bioluminescent plankton. Anyway, the point is: dots are fun, fast, and hard to mess up. And they pair nicely with a matte top coat if you want to tone down the shine.
- Use a matte top coat over the nude before adding gold dots, the contrast between matte and shiny gold looks expensive.
- Keep dots small, no bigger than the head of a pin. Big dots can look childish rather than elegant.
- Seal with a glossy top coat if you want the gold to pop like a wet pebble.
Half-Moon Manicure in Nude and Gold
Half-moon nails are making a serious comeback, and this version with gold accents is a fresh take. Here’s how I do it: apply a nude base coat and let it dry completely. Then take a hole reinforcement sticker (the kind you use for binder paper) and place it at the base of your nail, covering the cuticle area. Paint gold polish over the entire nail, then carefully peel off the sticker. You’ll have a nude half-moon at the base and a gold crescent on the rest of the nail. Or you can reverse it, paint the whole nail gold first, then use the sticker and paint nude over the tip. I prefer the first method because it keeps the gold as the main color, and the nude half-moon feels like a delicate frame. The trick is to press the sticker down really well so the polish doesn’t bleed under it. If you don’t have stickers, use painters tape cut into tiny circles. But honestly, the reinforcement stickers are cheaper and easier. A quick tip: use a detail brush dipped in acetone to clean up any edges that aren’t crisp. This manicure looks especially good on short, squoval nails. It also lasts a few days longer because the gold covers the wear-prone tip area.
Gold French Tips with a Nude Twist
The classic French manicure gets a glow-up when you swap white for gold. For this theme, paint your entire nail a sheer nude, something like “Ballet Slippers” by Essie, which is a milky pink that evens out your nail bed. Let that dry. Then apply a thin gold line along the free edge. But here’s where I do something different: instead of painting a solid tip, I make the gold line very thin, almost like a thread. I use a gold metallic striper polish with a fine brush. It gives the illusion of a gold rim without looking like a costume. Another variation is to curve the gold line into a tiny smile shape, then fill the entire tip with gold polish up to halfway down the nail. That creates a more dramatic gold half-tip, which is bold but still minimalist because the base is so neutral. I once wore this to a wedding and got three compliments from strangers. Not gonna lie, that felt good. One warning: gold polish can look patchy if you don’t use two thin coats. Let each coat dry for at least a minute before the next. And always finish with a high-shine top coat to make the gold reflect light evenly.
Minimalist Gold Lines Along the Cuticle
Let me talk about a trend I’ve been obsessed with: placing a thin gold line right at the cuticle, hugging the curve of your nail base. It’s like a tiny gold frame. To do this, you need a very steady hand or a thin strip of tape. I prefer tape because I shake like a leaf when I’m concentrating. Cut a small piece of striping tape into a curved shape that matches your cuticle line. Stick it down, paint gold polish on the exposed area just below the tape, and peel it off. The result is a crescent of gold that sits at the very base of the nail. It looks like you’re wearing a delicate gold ring on each finger. I pair this with a long-wearing nude creme polish like “Mademoiselle” by Chanel (pricey but worth it for the formula). The gold line should be no wider than 2 millimeters. Any thicker and it starts looking like your nail is bleeding gold. Keep it fine and precise. Also, this design works best on almond or oval nails because the curve matches your natural cuticle shape. On square nails, the line can look a bit flat, but it’s still doable if you soften the corners. I’ve been doing this for months and it never fails to make me feel classy, even when I’m just wearing sweats and drinking coffee.
So that’s the roundup. Five theme ideas for combining nude nails with gold accents, each with its own little personality. Honestly, my personal favorite is the cuticle line because it’s so unexpected. But the dots are a close second for when I want a touch of whimsy. Try one of these for your next manicure, and don’t stress about perfection. The gold hides small mistakes. And if you mess up, just say it’s abstract. No one will know but you. 😊
#nudenails #nailartideas #minimalistnails #goldaccentnails #easymanicure
Leave a Comment